
Like us on Facebook | Tag on Instagram: #wintercraftcommunity #wintercraftpics #icewrangler

If you have been wanting to try to make a Globe Ice Lantern Centerpiece for a celebration but for whatever reason have just not done it - try this . . . just start with a cake pan.
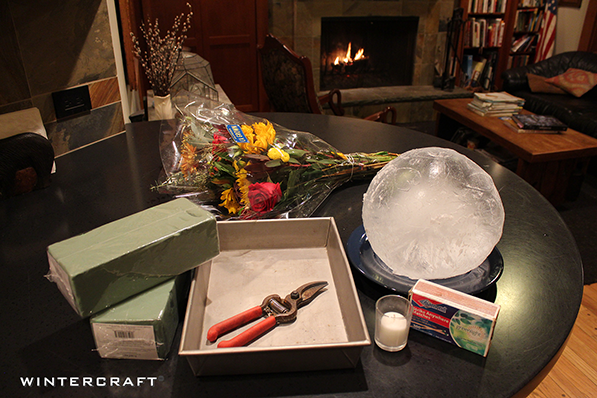
WHAT YOU NEED TO GET STARTED
BEGIN by cutting two 30" pieces of string or twine and laying it over the cake pan
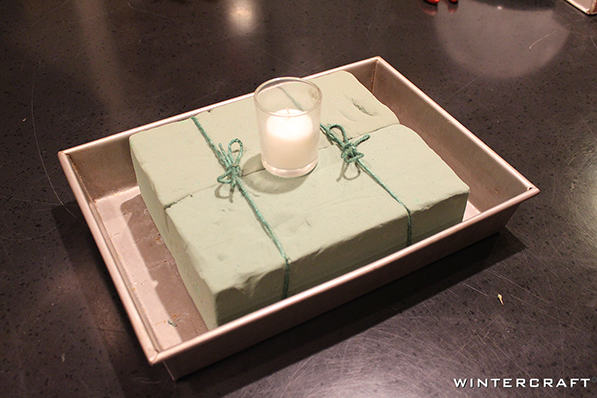
Place the two floral foam cakes side-by-side over the string and gently tie together. (Do not tie tightly as the string will cut into the foam.) Cut off extra string.
Place the candle in the candleholder in the middle of the floral foam.
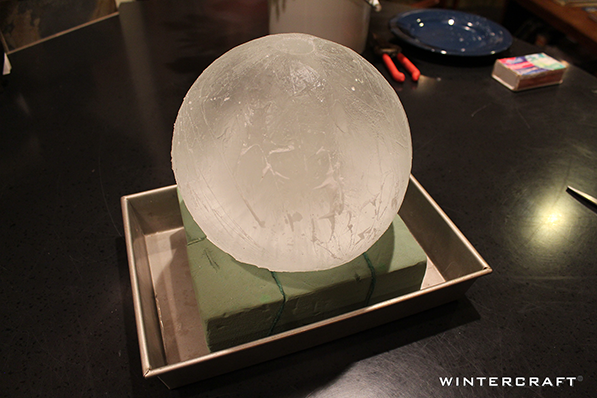
Place the Globe Ice Lantern over candle. (Make globe ice lantern using a Wintercraft Globe Ice Lantern kit following directions included in the kit).
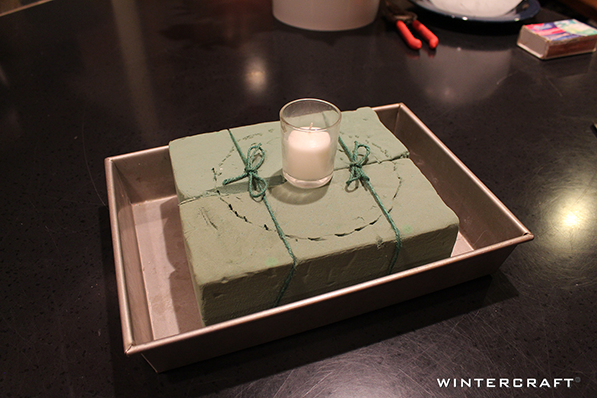
Create a circle in the foam around the base of the Globe Ice Lantern. With the end of the scissors, push into the floral foam at the base of the lantern. Remove the Globe Ice Lantern.
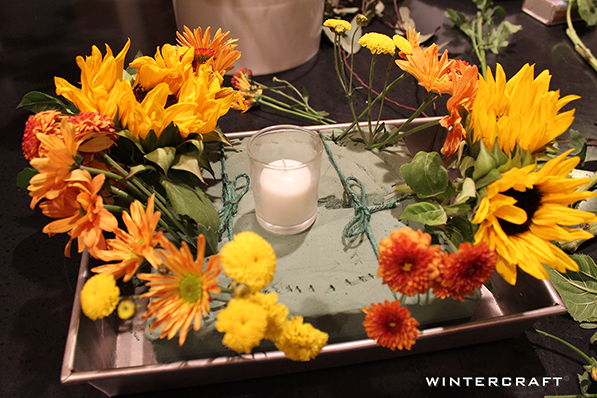
Add flowers by inserting them into the floral foam outside the circle marked in the foam.
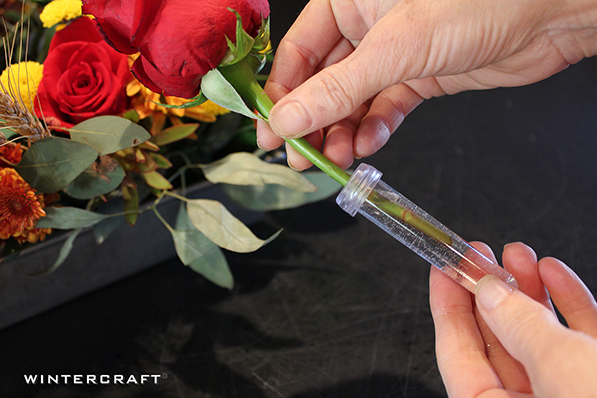
The floral foam is not soaked so it will absorb the melting ice. For that reason it is best do one or more of the following: Make the centerpiece just before using, or use sturdy flowers like mums, etc. or if you want to add more delicate flowers, use a floral tube.
Floral tubes are small plastic containers with a rubber top. One stem is pushed through the rubber top into the water you add to the tube. Now the flower and the tube can be pushed into the floral foam where you like and the flower will stay hydrated.
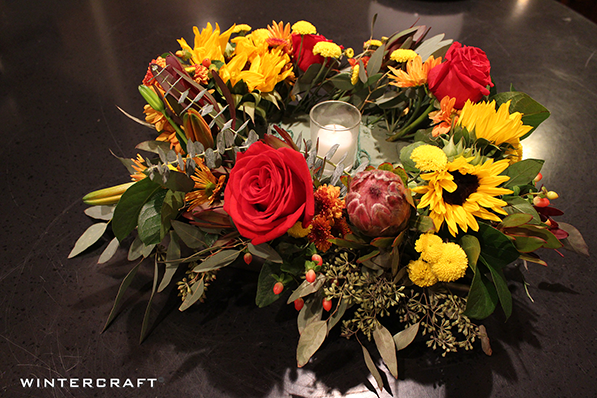
Continue adding flowers outside the traced circle in the foam until you have a nice arrangement of color and shapes. (Keep in mind that it is not necessary to use all the flowers and greens that came with your bouquet.)
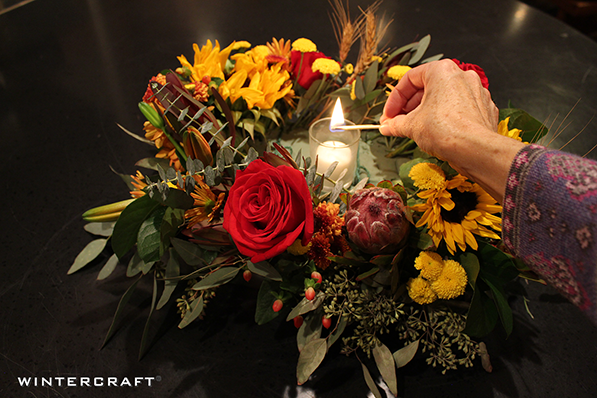
Light the candle - WARNING: make sure all flowers, greens or other flammable materials are clear of the candle before lighting.
If using a candle, follow the directions on the Globe Ice Lantern Kit for making a chimney.
Place Globe Ice Lantern with chimney over the lit candle.
I made this globe ice lantern ahead of time and stored it in the freezer in a plastic bag. When it is exposed to warm air it will frost over for a while and then that frost will melt away and will start to glisten.
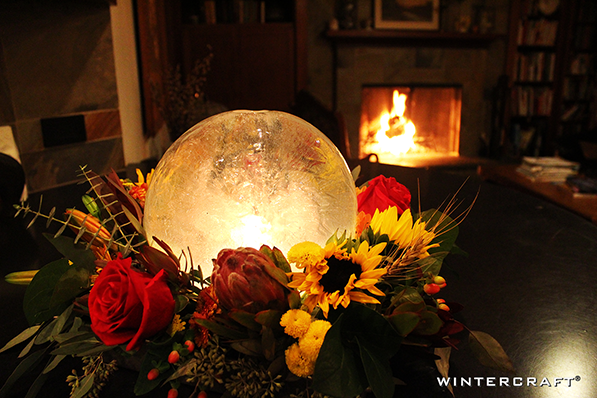
A Globe Ice Lantern Centerpiece made with the Wintercraft system is such a lovely way to bring the magic of an ice luminary into your home for a celebration. I hope you try this idea asap! For additional ideas, visit Wintercraft.com.
Enjoy the glow!
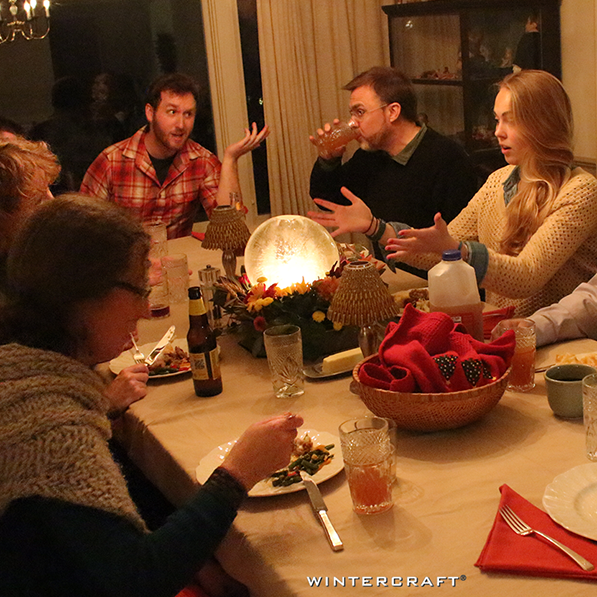
Thanksgiving 2014: Of course when I asked my family to hold still while I snapped a photo of the Cake Pan Globe Ice Lantern Centerpiece, silliness took over.
Chris. Here are some tips. First, you need a decent "chimney’ in the top of the globe. Although a drill is recommended in the kit, I found that heating up a sharpening steel on a stove burner, then pressing it gently into the top of the globe until it breaks through works better. It will take several reheatings to pierce through the ice, depending on thickness, but it’s rather satisfying. (this is after you’ve taken it out of the balloon and released the excess water.) You can do it while it sits in the sink. Once that is done, you have two options for creating enough ventilation at the base to allow for air flow. One is to turn the globe over (this time on a folded dish towel. Although it may stick a bit, you can peel it off.) and using the redhot poker again, make 3-4 holes equally spaced and about an inch up from the base. So there’s the larger opening where the votive will go in (In a glass holder. A votive not in a holder will not stay lit for long) and the 3-4 holes about an inch up from that. OR, and I think more effective, put some pine boughs on the surface where you plan to set the globe. Say, on porch steps or a garden ledge. Nest the votive in the middle of the boughs. Then place the globe carefully over the (lit) votive, resting on the boughs. The goal is to have the globe sit up off the surface a bit to allow air to flow through. I’ve even picked up sticks in the yard and put them down to form a simple trivet. It’s all about good air flow. So, provide some breathing room at the base and a good chimney at the top. Once the candle burns for a bit it will enlarge that chimney hole, so don’t worry about making it any bigger than the poker itself. Hope this helps. The only time I’ve had them go out is if I’ve placed them in deep snow which cuts off the air. Have to remember to brush the snow away at the base. Good luck!
Hello Chris,
Thank you for leaving a note – we greatly appreciate all feedback. Of course, our goal is not to leave someone frustrated, rather to enjoy a new activity. I’m sorry you experienced difficulty.
Here’s a recent blog about lighting: http://www.wintercraft.com/blogs/icewranglers-blog/18478771-how-to-light-a-globe-ice-lantern-basics
The kit you purchased only includes one styro insulating disk as most people just have room in their freezer to make one at a time (often as an indoor centerpiece). We include multiple freezing bases in some kits so that if one is to make them outside (typically in Dec – Feb in northern climates), they can make multiple globes at the same time. One does not need the insulating disk when outside – just place the freezing base on the earth or snow.
Thank you for your interest and for writing – should you choose to try again, please don’t hesitate to call or write with questions.
Best regards,
Tom Hedberg
Wintercraft
I was so excited to try the ice lanterns. I Didn’t have any trouble making them, although I was disappointed to learn I would need to make them 1 at a time, as I needed to make them in my freezer and use the single styrofoam that came in the kit. I wanted to put them along our front walk on Christmas Eve. Well we did everything right, the "chimney " the elevation so they could have air and they would not stay lit for anything. It was so frustrating, I doubt I will try them ever again. They were beautiful while lit if only it would have lasted.
Comments will be approved before showing up.


21 November, 2015
Tom Hedberg
A quick comment for Susan. As to air flow when in snow. We often make a small channel in the snow in one spot – away from the wind direction – sort of a canal for air to enter at the bottom as you are correct, a tight seal with the snow reduces airflow. We’ll make a video this winter and post it about this technique!